 Skip to content

Is your morning shower turning cold halfway through? Or worse, is the water stone cold? I’ve repaired hundreds of electric water heaters over the last decade, and 90% of the time, the culprit is a simple $20 part: the heating element.
You don’t need to call a plumber immediately. In this guide, I’ll show you exactly how to diagnose the problem using a multimeter. It’s a straightforward process, but safety is non-negotiable.
⚠️ CRITICAL SAFETY WARNING: > You will be working near high-voltage electricity (240V). Always turn off the circuit breaker before opening any panels. If you are uncomfortable working with electricity, please contact a professional.
Understanding the Symptoms: Which Element is Bad?
Most residential electric water heaters have two elements. Understanding which one failed can save you time:
- No Hot Water at All: Usually indicates the Upper Element (or thermostat) has failed. The top heats first; if it fails, the bottom never turns on.
- Run Out of Hot Water Quickly: Usually indicates the Lower Element has failed. The top heats the water, but the bottom isn't maintaining the reserve temperature.
Tools You Will Need
- Multimeter (Digital or Analog)
- Non-Contact Voltage Tester (Highly recommended for safety)
- Screwdriver (Phillips and Flathead)
- Socket Wrench (if replacement is needed later)
Step 1: Safety First – Power Down
Before touching anything, go to your home’s electrical panel. Find the circuit breaker labeled "Water Heater" (usually a double-pole breaker) and flip it to the OFF position.
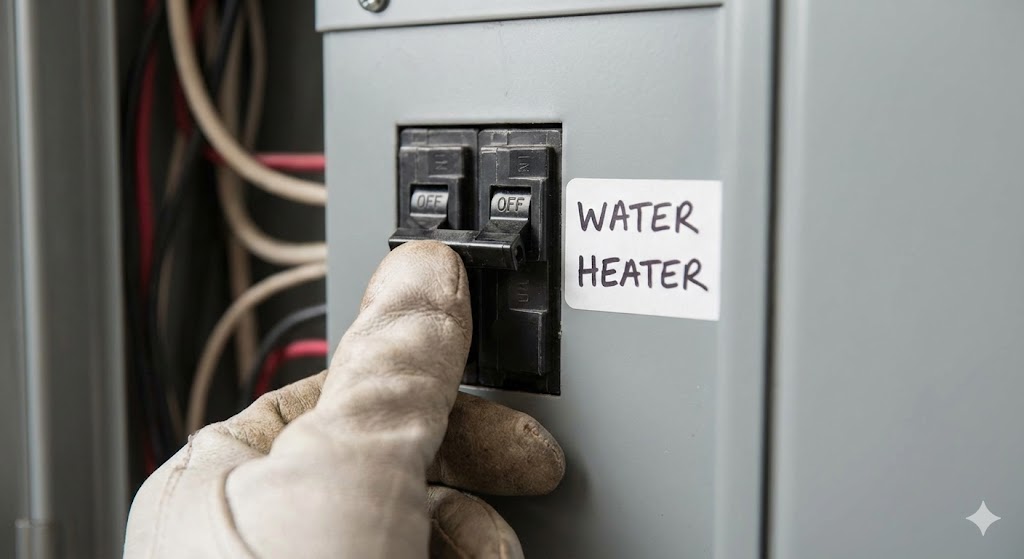
Pro Tip: Put a piece of tape over the breaker switch so no one accidentally turns it back on while you are working.
Step 2: Expose the Elements
- Locate the metal access panels on the side of the water heater tank.
- Remove the screws and take off the metal cover.
- Fold back the insulation carefully. You will see a plastic safety guard and the end of the heating element with two screws (terminals).
- Verify Power is Off: Use your Non-Contact Voltage Tester near the wires. If it doesn't beep, you are safe to proceed.
Step 3: Visual Inspection
Before using the meter, look closely at the element.
- Is there rust or moisture? A leak means the tank gasket or the element itself is cracked.
- Are the wires melted? Loose connections can cause arcing.
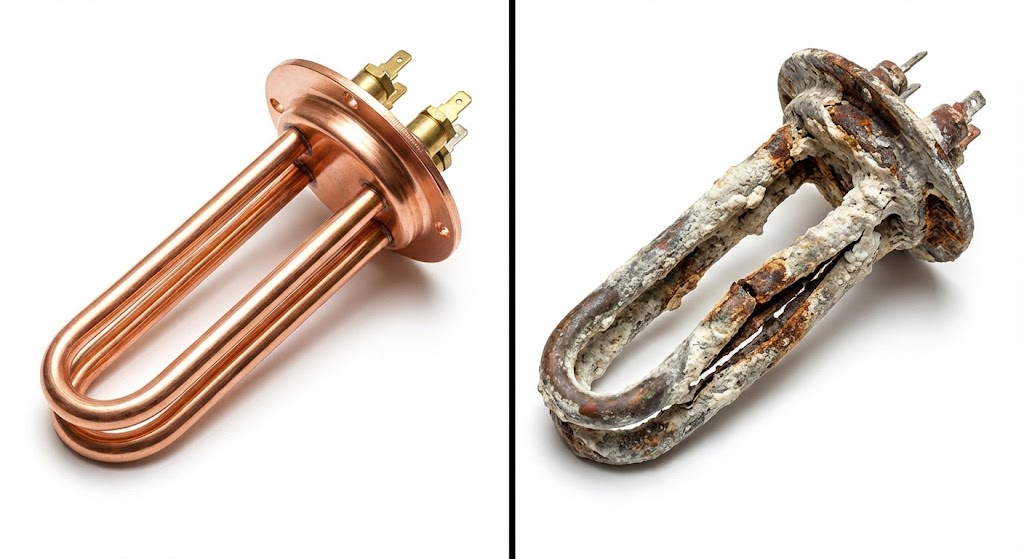
If it looks physically damaged, stop testing—it needs to be replaced.
Step 4: Configure Your Multimeter
This is where many beginners get stuck.
- Turn your multimeter dial to the Lowest Ohms (Ω) setting (usually 200Ω or the symbol that looks like a horseshoe).
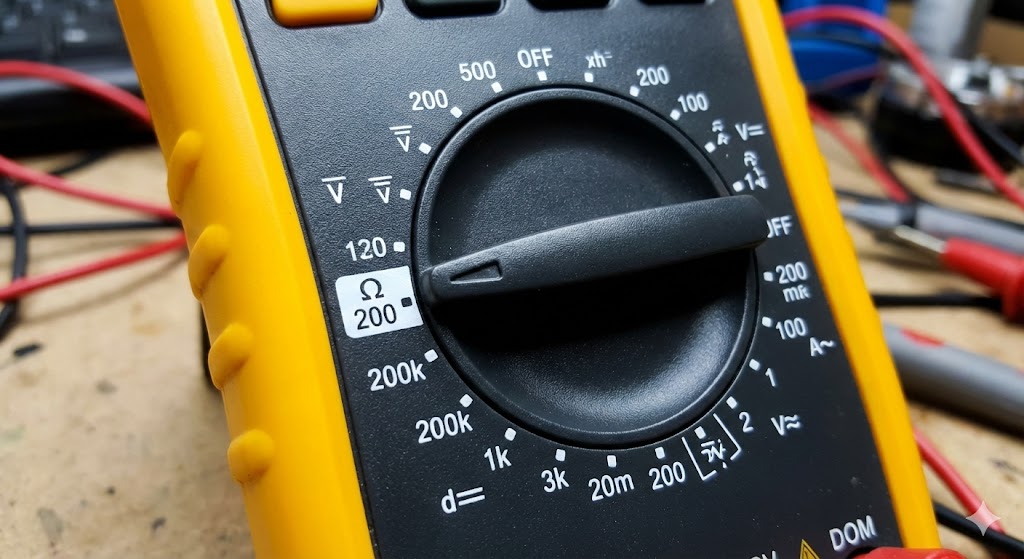
- Test your leads: Touch the red and black probes together. The screen should read close to 0.0 Ω. This confirms your meter is working.
!
Step 5: The Resistance Test (The Accurate Way)
To get a true reading, you must isolate the element from the rest of the heater’s wiring.
- Loosen one screw on the heating element terminal.
- Disconnect one wire so it is hanging freely and not touching anything metal. (If you leave both connected, you might get a false reading through the other element).

- Touch one multimeter probe to one screw terminal and the other probe to the other screw terminal.
!
Step 6: Interpret Your Results
Compare your reading to the table below to determine the health of your element.
| Reading on Screen | Diagnosis | Action Required |
|---|---|---|
| 10 – 16 Ω | Healthy | The element is fine. Check the thermostat instead. |
| 0 - 1 Ω | Short Circuit | The element is shorted internally. Replace immediately. |
| "OL" or "∞" (Infinity) | Open Loop (Broken) | The internal wire is snapped. Replace immediately. |
(Note: Resistance varies slightly by wattage. A 4500W element typically reads around 12.8Ω).
Step 7: Check for a "Grounded" Element
Sometimes an element breaks and touches the outer metal sheath.
- Touch one probe to a screw terminal.
- Touch the other probe to the metal body of the water tank (or a unpainted bolt).
- Result: You should see "OL" (Open Loop). If you get any number reading, the element is grounded and dangerous. Replace it.
Next Steps: Choosing a Replacement
If your test confirms a bad element, you need a replacement.
- Match the Voltage & Wattage: Look for the rating stamped on the side of the old element (e.g., 240V / 4500W). Installing a 120V element in a 240V system will cause it to explode.
- Choose Quality: At ELEKHEAT, we manufacture OEM-grade elements that are pre-tested for precise resistance, ensuring you don't have to repeat this job anytime soon.
🔧 EXPERT TIP: The "Dry Fire" Mistake > When you install the new element, you must fill the tank with water BEFORE turning the power back on. If you turn the power on while the tank is empty, the new element will burn out in less than 5 seconds. Open a hot water faucet in your house; when water flows steadily, the tank is full.
FAQ: Common Questions
Q: Do I need to drain the water tank to test the element? A: No. You only need to drain the tank if you are removing the element. For the multimeter test described above, keep the water in the tank (just make sure the power is off!).
Q: Both elements test fine, but I still have no hot water. A: The problem is likely your Thermostat or the Reset Button (the red button on the upper thermostat). Try pressing the reset button first. If it clicks, it was tripped.
Q: Can I use a higher wattage element for faster heating? A: Generally, no. Your home's wiring and circuit breaker are sized for specific wattage. Increasing it can cause a fire hazard. Stick to the manufacturer's rating.
Need high-quality replacement parts? Browse ELEKHEAT’s Durable Water Heater Elements to restore your comfort today.